Drawing Realistic Eyes

Hello! To all of you that are working hard and turning in your work you are doing a good job!! Keep up the good work!!

This week we will begin with drawing the face. We will start with the eyes. Please use the video and follow along on how to draw a realistic eye. Take your time and pay extra attention to detail. I am noticing a lot of the drawings that are being turned in can be a bit more detailed. Drawing eyes is a bit more difficult but I want you to really try and do your best. You may surprise yourself with how well you do. Also practice, drawing more than one eye can help you improve your skills. Practice in art helps you grow your skills.

I miss you all and I hope you are doing well! If you have any questions please contact me via email or send me a message in edmodo.

VA Comp Students Only – Artist Research

Hello! I hope that you enjoyed your week off last week. I hope you are ready to dive back into VA Comp so we can get this year finished strong! We also need to be doing our digital portfolios. The district has not said that this requirement is no longer a requirement. I will be working on a step by step for your weebly sites this week.

When you left school you were given a packet. That packet had a pdf of questions for an artist research assignment. Please choose an artist from the list that is attached to this email from the art of education website. If you do not have the artist research questions please let me know so I can get it to you. Take a look at some of the art that these artist created. Choose and artist based on their work and what drew you to them. This list has a very wide variety of artists so I know there is something here for everyone.

I would also like to do a online live meeting this week or next week if possible. Please let me know what times work for your schedule so we can make sure we can get as many people on as possible.
Here is the list of Artists

I miss you all and I hope you are doing well!
Mrs. Wong

Sketch Your Bedroom like Vincent Van Gogh’s Bedroom at Arles Painting

Hello! I hope you all enjoyed your spring break and are refreshed and ready to get back to work!

This week’s assignment is for you to draw and color your bedroom. When Van Gogh live in Arles, France he painted the bedroom he lived in. It is a simple painting but still shows his brilliant use of color and his grasp of the element of Space. He used a perspective to show space in the room similar to how we used perspective in art class. I would like for you to draw your bedroom as realistically as possible. I want you to take your time, to try and show three dimensional space, to color it neatly and use difference in value(shades from light to dark) to show form(3-d shapes). This should take you a longer than an hour to complete if you are doing it correctly. Do not rush through this. Add details like the pictures on your walls, the items on your shelves, tables, the floor.

If you want to learn more about the painting by Van Gogh that I have attached to this assignment then go to the link below that I have attached.

I hope you are doing well! I miss seeing you everyday. Please let me know if you have any questions.
Mrs. Wong

Alternative Paints!

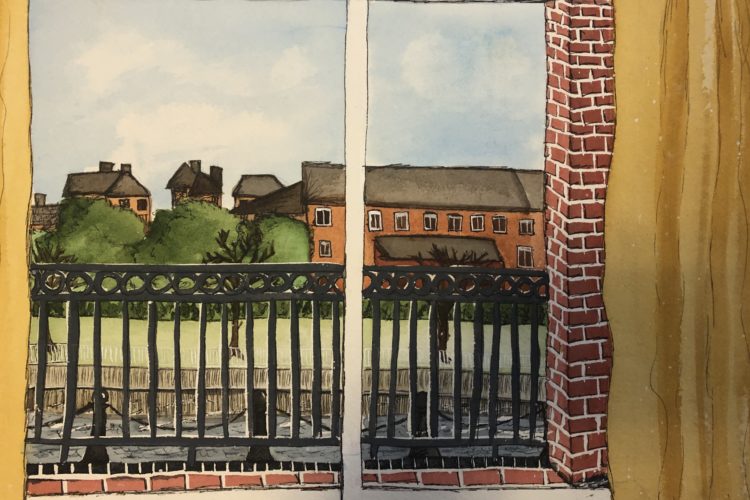
Today’s assignment has to do with using alternative painting methods. Did you know that painters in the past had to come up with their own paint mixtures? They didn’t have stores to go and buy paints at like we do. So, put on your renaissance hat and become a scientist as well as an artist!

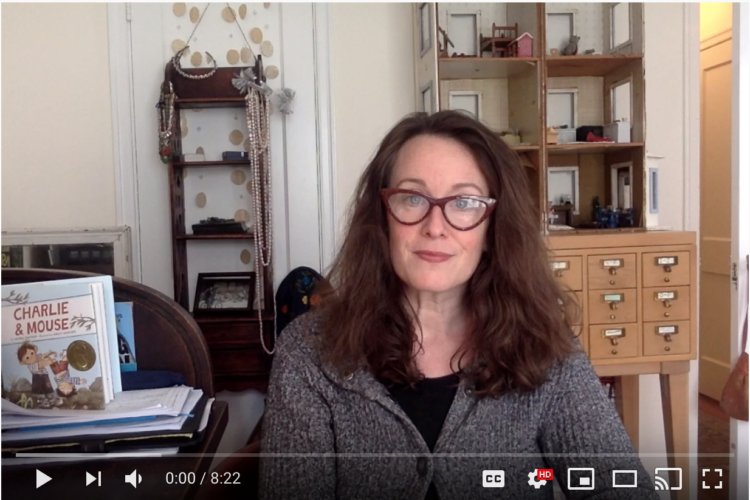
Please watch the video for a little more explanation:


Helpful Hints:

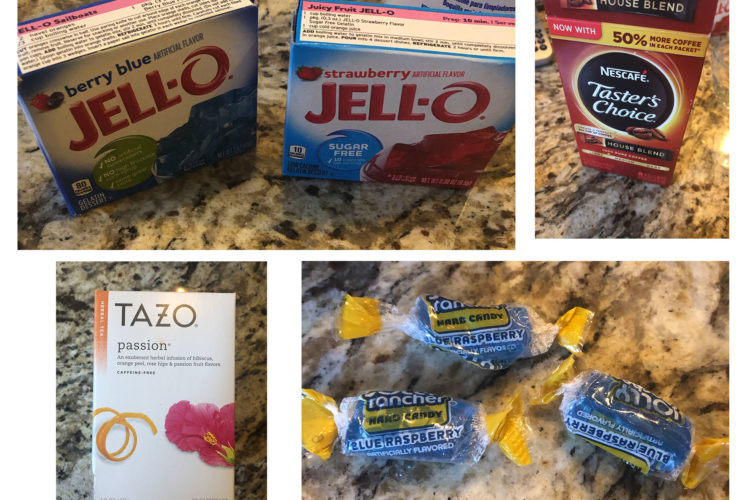
  • Use hot water to dissolve candy, jello, koolaid, etc.
  • Use as little water as possible to create the color so the hue will be strong. You an dilute the color as needed later using a watercolor technique.
  • Practice on a separate sheet of paper to get used to the paint and techniques.
  • Do not expect perfection, be flexible with the process.
  • Ask your parents permission before you use any of the items above.


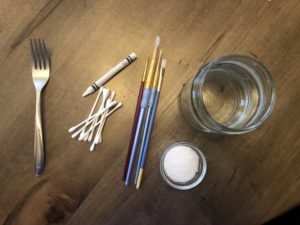
I also want you to think outside of the box about tools you can use to paint with. You can use q-tips, silverware(like a dip pen), your finger, a clean make up brush, etc. Many of you may not have paint brushes so just use what you have.


Watercolor Techniques

Please see the illustration for visual representations for different water color techniques:

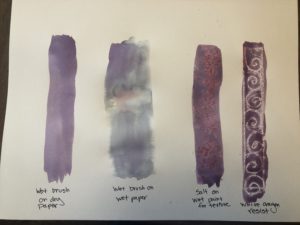
  • wet brush on dry paper
  • wet brush on wet paper
  • sprinkle wet paint with salt for added texture when dry
  • use a white crayon as a way to resist water color paint and keep white parts white, you must draw on the highlights first for this to work.


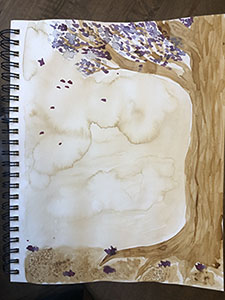
Your assignment is to create a painting using this alternative paint that you have made. This is an experiment, I do not expect perfection. I want you to have some fun, think outside of the box and take your time creating your painting to have differences in value(shading). I don’t care what you paint as long as it has 3-dimensional form and shows shades of light and dark. Good Luck! I am excited to see what you create!

Image of Laurel Snyder

Second Distance Learning Assignment

Hello Artist’s!!

A local children’s author Laurel Snyder is looking for some animal illustrations for her new picture book that is coming out. Please see the video below for more specific information. Please email all illustrations next week so we can send them to her for her careful consideration. Remember to add details, color, take your time to make it your own and unique.


Happy Creating!!

First Sketchbook Assignment

It has been brought to my attention that the Edmodo website seems to be having some traffic issues with this new influx of students, parents and teachers all trying to post assignments. So, I want to make sure you know your assignment for today.

Complete the sketchbook prompt to draw the view from your window. I have taken a photo of a watercolor painting I did of our view from the window of an apartment we lived in in Cambridge, England. Please use this as an example to your work. Use most of the page and add color if you have it, otherwise use pen and ink to add value (shading).

Please make sure to add as many details as possible, take your time. I will be working on these prompts too. We will post them and we can all enjoy seeing each other’s views since we are mostly staying home.

Student Packets for E-Learning

Each student was sent home with a packet of sketchbook prompts and worksheets on Friday. There were three versions given out. I will label them and post them for you to copy if your students did not receive one of the packets Friday.


Please note that the assignments in these packets are not assigned until Mrs. Wong posts them on her Edmodo Account. Please click on the link below to get class codes and more e-learning information

Grid Drawing

Using the grid to create your drawing is a very valuable skill to learn to help you blow up images when drawing or just trying to reproduce a very photo real or highly detailed drawing. Using the grid is a difficult skill at first but as you practice transferring the image square by square it actually makes it much easier to reproduce the image than if the grid was not being used. Please see the examples of student work below to see our success with the grid drawing project.


Cup Drawing

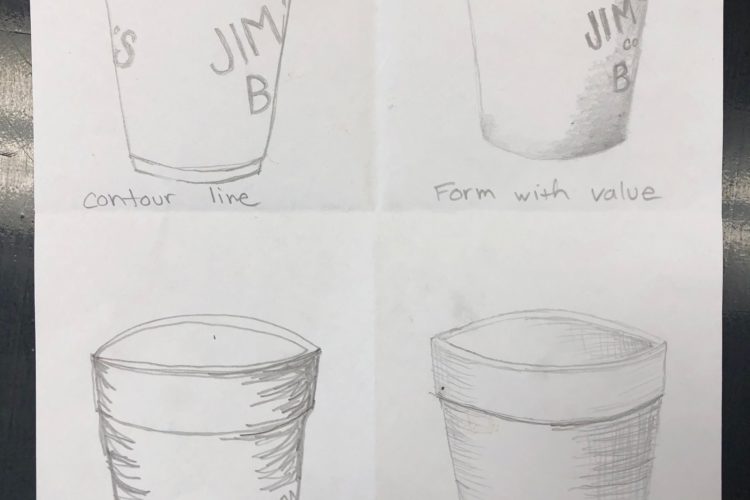
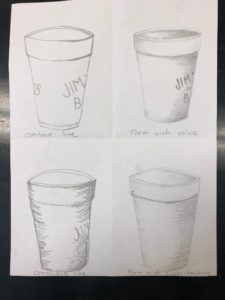
During our line unit we used 4 different kinds of lines and some shading to draw the same cup 4 different ways. The first way we used contour line and demonstrated how varying the line between thick and thin can give a drawing form. We then used shading to draw the second cup to show it three dimensionally. Our fourth drawing we used cross hatching as a way to use lines for shading. Then finally we used a continuous line where you did not lift your pencil off of the paper to create a shaded and quick sketch. This is usually the most challenging since we are all used to being able to lift out pencils and realign any mistakes.